 Apache NetBeans
Refactoring with Inspect and Transform in the NetBeans IDE Java Editor
| This tutorial needs a review. You can edit it in GitHub following these contribution guidelines. |
The NetBeans IDE Java Editor features an Inspect and Transform feature, which is a refactoring tool for running various inspections and transformations on the selected scope of files at once. It also enables a user to define a custom inspection.
In this tutorial, you will learn to perform a code review using inspections with refactoring and predefined set of inspections, manage configurations, and create custom inspections.
Setting Up the Tutorial Environment
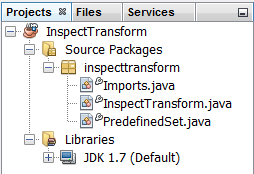
In addition to the required software listed above you should have the InspectTransform.zip file unzipped into your NetBeans project folder and opened in the NetBeans IDE as follows:
Running Inspections
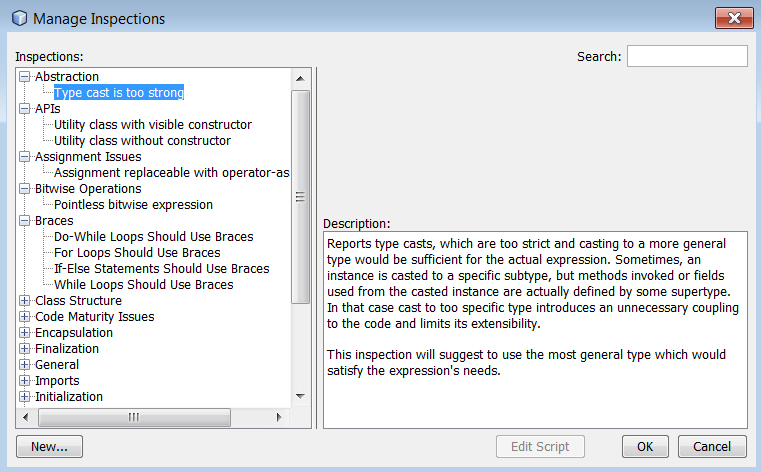
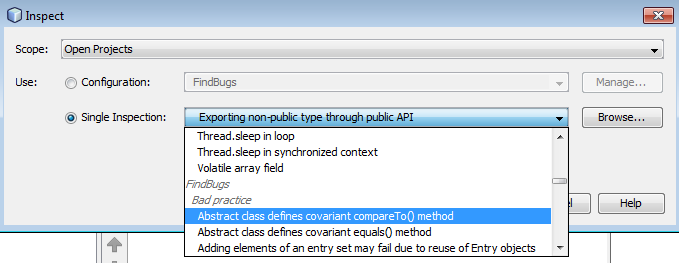
The Single Inspection option in the Inspect and Transform dialog box (Refactor > Inspect and Transform) offers a big variety of inspections related to particular refactoring transformations. The complete list of such operations is available in the Manage Inspections dialog box after clicking the Browse button to the right of the Single Inspection option.
The Search field enables you to check if a required inspection is available using a keyword lookup. For example, there are several inspections found when operator is searched for.
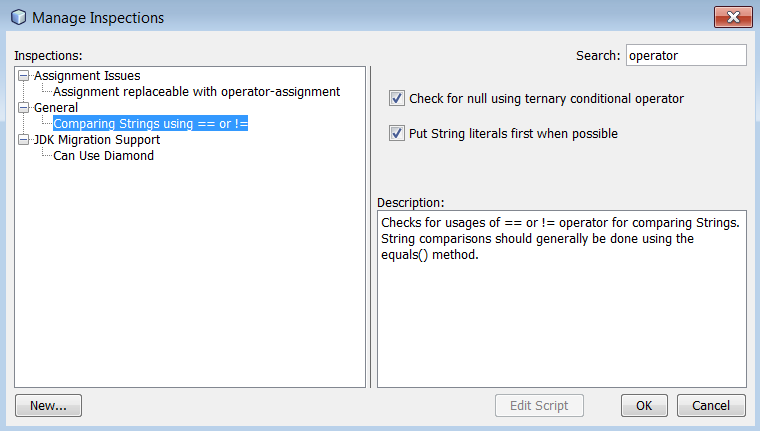
Every inspection is provided with a description available either in the Description field or in the Manage Inspection dialog box.
To run an inspection and apply an existing Inspection:
-
In the Projects window, select the
InspectTransform.javafile. -
Choose Refactor > Inspect and Transform from the IDE’s menu.
-
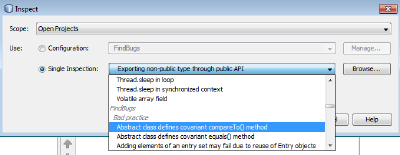
In the Inspect and Transform dialog box, select the Single Inspection option and click Browse.
-
In the Manage Inspections dialog box, choose the
Assignment replaceable with operator-assignmentinspection in the Assignment Issues node. -
Click OK to close the Manage Inspections dialog box.
-
Click Inspect in the Inspect and Transform dialog box. The suggested refactoring changes display in the preview panel.
-
Click Do Refactoring to apply the changes if required.
Using Configurations
A set of refactorings grouped together constitute a configuration that can be run on your scope of interest, for example, a class or several classes, packages, or projects. The IDE offers the following predefined configurations:
| Not all releases of the JDK introduce new language features. |
Migrate to JDK 5
The Migrate to JDK 5 configuration available in the IDE by default incorporates such refactoring operations as static imports, JDK 5 for-loop usage, unnecessary boxing and unboxing, and switch over Strings application.
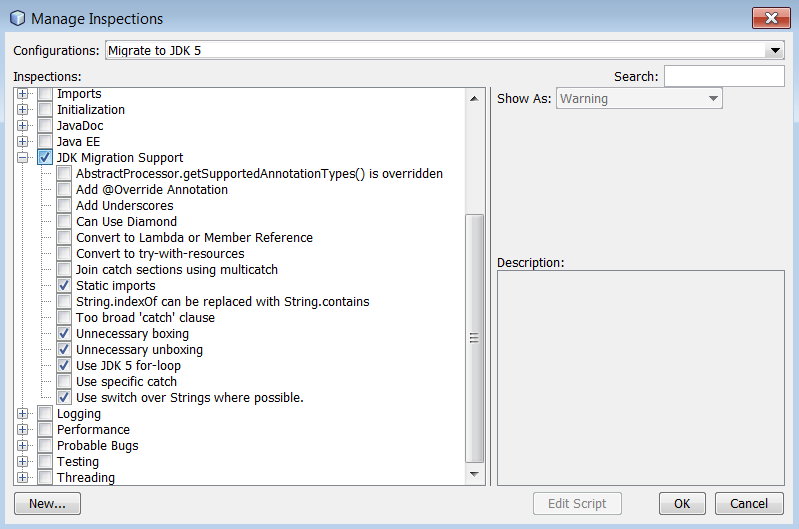
The list of refactorings in the configuration can be modified in the Inspections list of the Manage Inspections dialog box by selecting and deselecting the items under the JDK Migration Support node.
|
Migrate to JDK 7
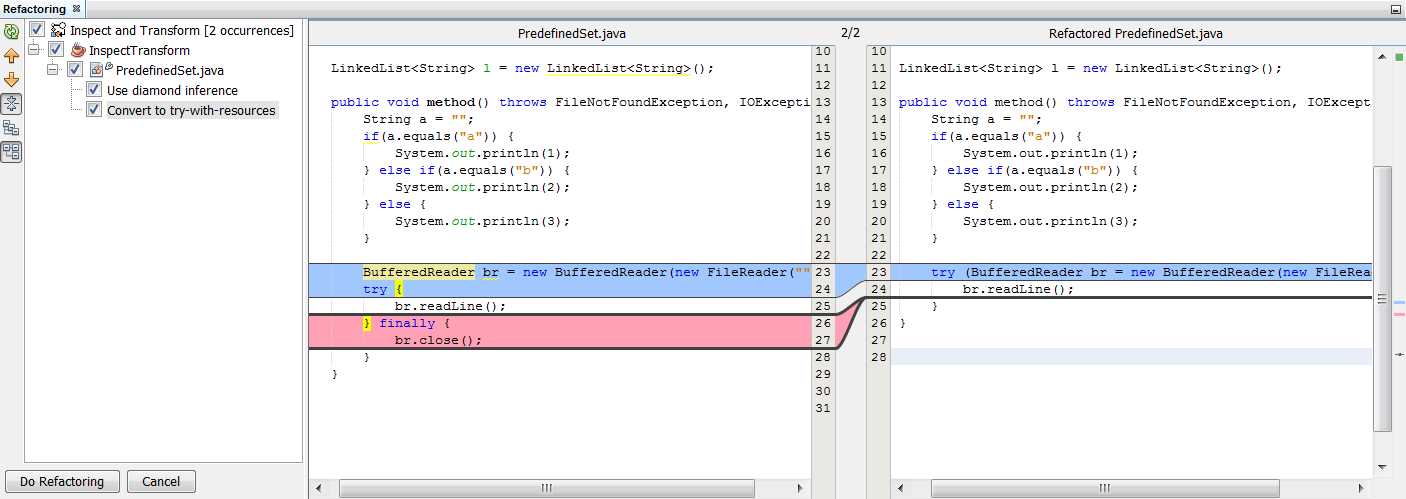
The Migrate to JDK 7 configuration available in the IDE by default incorporates such refactoring operations as diamond operator usage, try-with-resources conversion, multicatch usage, switch over Strings application, and others.
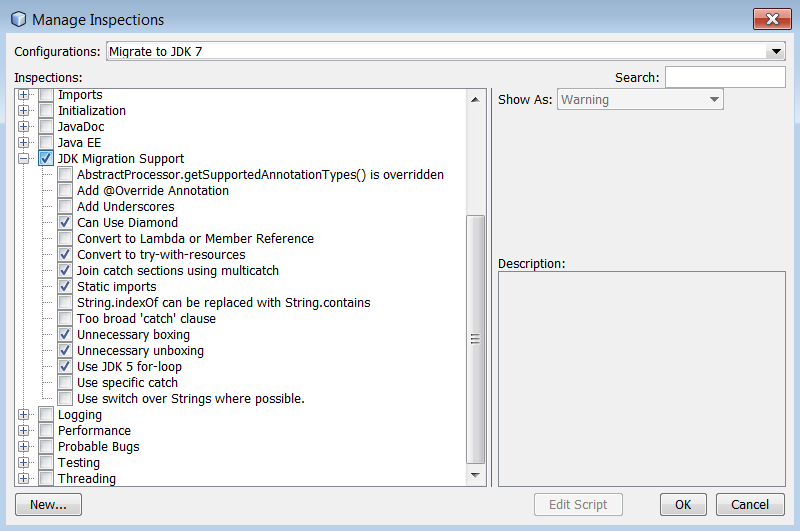
The list of refactorings in the configuration can be modified in the Inspections list of the Manage Inspections dialog box by selecting and deselecting the items under the JDK Migration Support node.
|
To run and apply the default Migrate to JDK 7 configuration:
-
In the Projects window, select the
PredefinedSet.javafile. -
Choose Refactor > Inspect and Transform from the IDE’s menu.
-
In the Inspect and Transform dialog box, select the Configuration option and choose the
Migrate to JDK 7set of inspections from the drop-down list. -
Click Inspect. Changes that convert the code to JDK 7 syntax display in the preview panel.
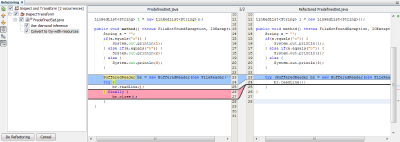
-
Click Do Refactoring to apply the changes if required.
Migrate to JDK 8
The Migrate to JDK 8 configuration available in the IDE by default incorporates such refactoring operations as Lambda or Member Reference conversion, static imports, multicatch usage, switch over Strings application, and others.

The list of refactorings in the configuration can be modified in the Inspections list of the Manage Inspections dialog box by selecting and deselecting the items under the JDK Migration Support node.
|
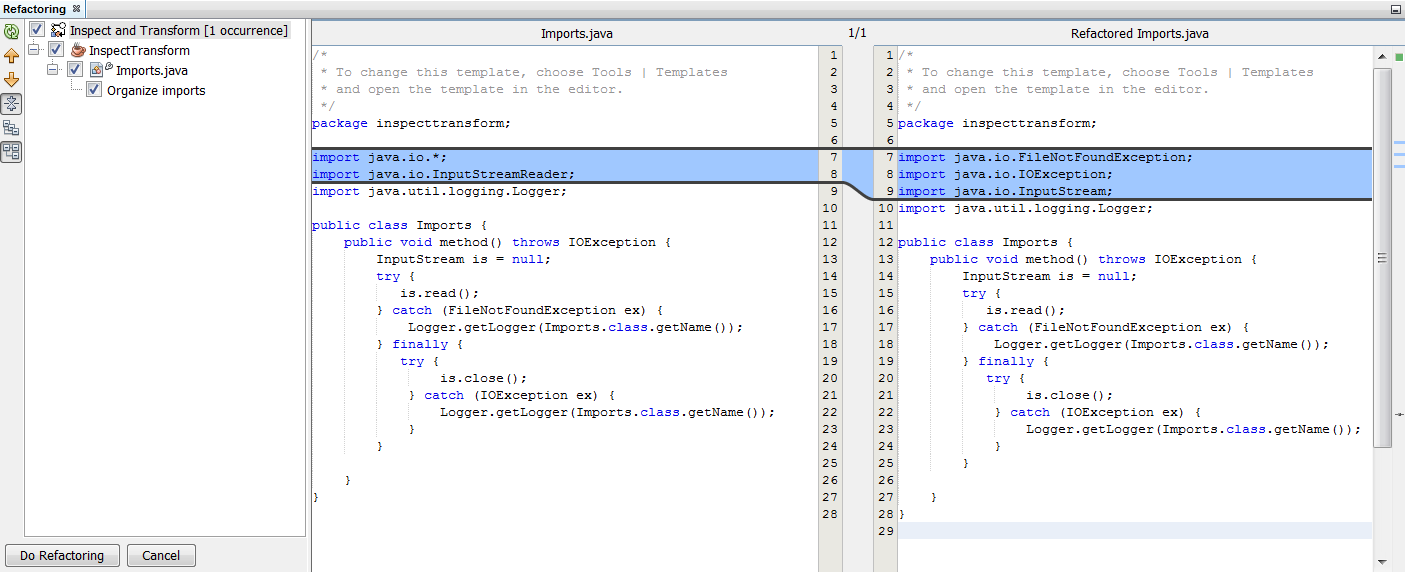
Organize Imports
The Organize Imports configuration enables you to inspect the way import statements are organized in the code and refactor your code if desired. By default it includes a single inspection that checks whether import statements correspond to the specified code style rules.
| To configure the code style rules for import statements: |
-
Choose Tools > Options > Editor > Formatting in the main IDE toolbar.
-
Select Java in the Language drop-down list.
-
Select Imports in the Category drop-down list.
-
Specify the available options as required.

-
Click OK to save your edits.

To run and apply the default Organize Imports configuration:
-
In the Projects window, select the
Imports.javafile. -
Choose Refactor > Inspect and Transform from the IDE’s menu.
-
In the Inspect and Transform dialog box, select the Configuration option and choose the
Organize Importsitem. -
Click Inspect. The preview panel displays one occurrence proposed for the Import section of the
Imports.javafile to make it aligned with the specified code style rules.
-
Click Do Refactoring to apply the changes if necessary.
Managing Custom Inspections
A custom inspection can be created to instruct the IDE what code structures are to be found and how to transform them.
| To avoid adding a duplicate inspection to the IDE, choose Refactor > Inspect and Transform from the main menu, click either Manage or Browse, and, in the Manage Inspections dialog box, use the Search field to look for the required inspection prior to creating a new inspection. |
To create a custom inspection:
-
Choose Refactor > Inspect and Transform from the IDE’s menu.
-
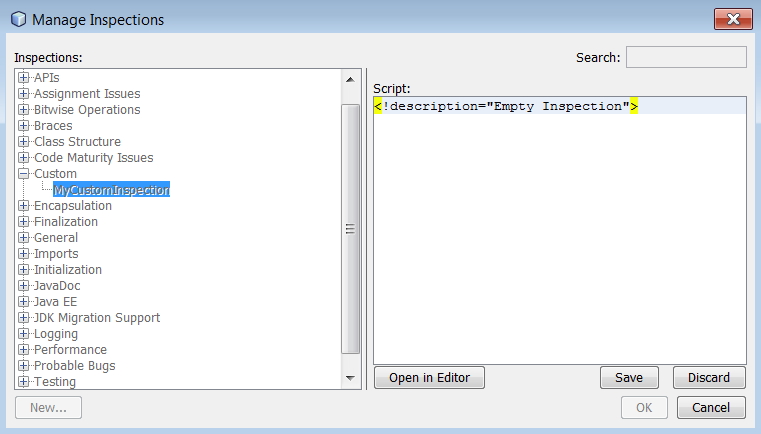
In the Inspect and Transform dialog box, click either Manage or Browse.
-
In the Manage Inspections dialog box, click New. A
Custom > Inspectionnode is created in the Inspections list.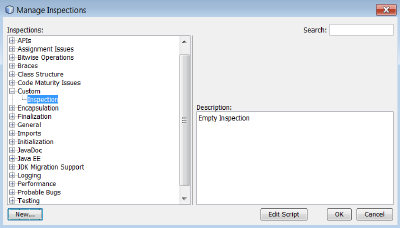
-
(Optional) Right-click
Inspection, choose Rename from the popup menu, specify the name required for your custom inspection (for example,MyCustomInspection), and press Enter. -
Click Edit Script. The Script text area displays.

-
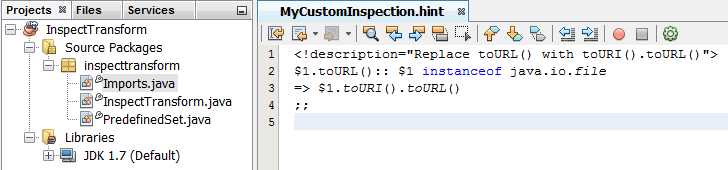
Type the inspection description and code in the Script text area or click Open in Editor and specify the same in the
MyCustomInspection.hintfile.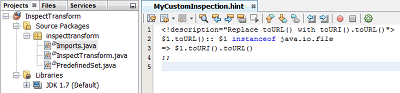
-
Click Save below the Script text area or press Ctrl + S in the Editor to save your edits.
-
Click OK to close the Manage Inspections dialog box or close the
MyCustomInspection.hintfile in the Editor. Your custom inspection is done and ready to be applied.

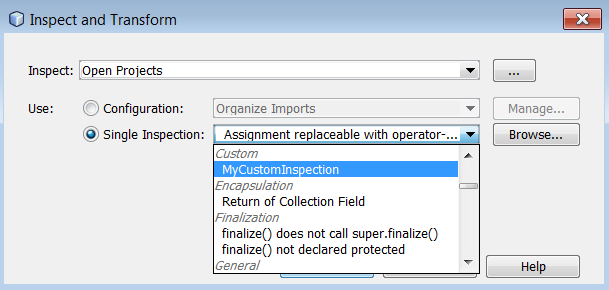
To run the custom inspection you created:
-
Choose Refactor > Inspect and Transform from the IDE’s menu.
-
In the Inspect list of the Inspect and Transform dialog box, specify a file, package, or project(s) to be inspected. Alternatively, click the button to the right to open the Custom Scope dialog box and specify the custom code to be inspected.
-
Select the Single Inspection option and choose the
MyCustomInspectioninspection.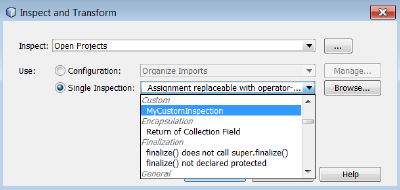
-
Click Inspect. The suggested refactoring changes display in the preview panel.
-
Click Do Refactoring to apply the changes if required.
-
Summary
This tutorial covers most frequent usages of the Inspect and Transform feature. Please note that with the Inspect and Transform functionality you can also perform custom refactoring at project scope, or apply particular refactoring configurations to several projects open in the IDE, etc.
